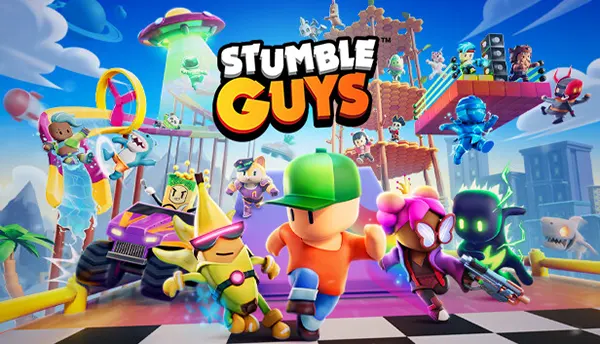
Stumble Guys: how to clear maps consistently – movement, timings and reliable tricks (2026)
Stumble Guys looks chaotic, but consistent clears are mostly about repeatable habits: how you carry momentum, when you commit to a jump–dive, and how you avoid being “in the crowd” at the wrong moment. This guide is written for real matches in 2026: stable movement fundamentals, timing cues you can actually remember, and practical tricks that work across most map types without turning every run into a gamble.
Movement fundamentals that make every map easier
Start with your camera and your line. The best players are not constantly zig-zagging; they pick a lane, keep the camera slightly ahead of the character, and make fewer micro-corrections. Over-correcting is the hidden reason you get clipped by moving blocks or pushed off a narrow path: your character “leans” into hazards because the stick input is never neutral.
Cornering matters more than speed. When you approach a turn, cut it early and exit wide, like you would in kart racing. That keeps your momentum and reduces shoulder-to-shoulder contact, which is where most random knockdowns happen. If you’re forced into traffic, aim for the edge of the pack rather than the middle, even if it looks longer on paper.
Learn the difference between “safe jump” and “commit jump”. A safe jump is one where, if you land slightly short, you still survive. A commit jump is one where a small mistake means a fall. In early sections, choose safe jumps to keep rhythm; save commit jumps for moments where the shortcut genuinely skips a dangerous cluster of obstacles or a slow cycle.
Jump–dive control: when to use it and when to avoid it
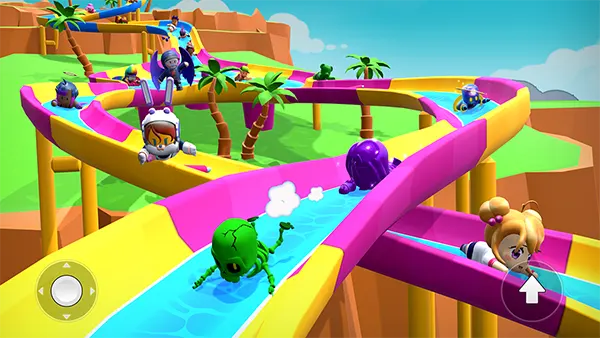
The jump–dive chain is your main tool for consistency because it extends reach and can stabilise awkward landings. The common mistake is diving too early: you lose the option to adjust mid-air, and you often slide into the next obstacle. Treat dive as a second phase: jump first, confirm your landing spot, then dive to extend or to “flatten” your landing when you need to slip through a tight gap.
Use dive to protect momentum on small drops and uneven surfaces. If a map has short ledges or broken tiles, a controlled dive can reduce the bounce you get from clipping an edge. However, avoid diving onto steep slopes or conveyor sections unless you know the landing is clean, because the slide can carry you sideways into a wall or into other players.
Make one rule and stick to it: never dive into a crowd unless you’re finishing. Diving into bodies is an invitation to be knocked down in a chain reaction. If you’re approaching a congested choke point, keep your jump without dive, land upright, and take the outside lane. The time you “lose” is often recovered because you stay on your feet.
Timing the map cycles: reading patterns instead of reacting late
Most obstacles are not random; they are rhythm. Rotating bars, swinging hammers, moving platforms and pushers all have a cadence. Your goal is to arrive at an obstacle as it opens, not to stop in front of it and wait. That means you sometimes slow down one step earlier so you can pass through with flow rather than collide and lose far more time.
For rotating bars and sweepers, watch the centre axis, not the bar end. The bar end looks faster and makes you panic-jump. If you track the centre, you’ll see the true timing window and you’ll jump later and cleaner. When you must cross multiple sweepers, don’t sprint between them on autopilot; take half a beat to sync with the next rotation.
On moving platforms, the safest habit is “commit only when the platform is coming to you”. Jumping to a platform that is moving away turns a normal jump into a maximum-distance jump, which is where tiny misalignments ruin the run. If you have to jump to an “away” platform, add a short stutter step and jump at the latest possible moment.
Three timing cues you can memorise for spinners, pushers and conveyors
Spinners: jump when the bar has just passed your character’s shoulder line, not when it is directly in front. That gives you the cleanest arc and reduces mid-air contact. If you’re nervous, jump straight up rather than forward, then move after landing; it’s slower but far safer in qualification games.
Pushers: treat them like doors. Don’t fight the push; approach at a shallow angle and let the pusher “guide” you into the open lane. If you go head-on, you get full force and lose control. If you approach diagonally, you often keep your feet and you can immediately correct your line.
Conveyors: your job is to minimise sideways movement. Side steps on conveyors are expensive because they multiply drift. Pick a lane early, keep the stick input gentle, and jump only when you can land on a stable area, not on the seam between two conveyor sections. If you get bumped, stop correcting for a split second, regain centre, then steer again.
Risk management: shortcuts, crowd control and the finish line
Shortcuts are only worth it if they reduce your exposure to hazards, not just distance. A shortcut that skips one corner but forces a commit jump over a moving gap is often a net loss across many runs. Think in averages: choose the route that gives you the most “boring” finishes, because boring in Stumble Guys is consistent.
Crowd control is mostly positioning. In the first ten seconds, avoid the centre line where everyone collides. Take a slightly wider start and you’ll reach the first obstacle with space. When you see a funnel (a narrow bridge, a door, a single platform), aim for the edge and be patient for one beat; pushing into the middle usually causes a pile-up that costs far more time.
The finish line is where players throw runs away. If you are already qualifying, don’t jump into the last rotating bar just to “look fast”. Stay grounded, take the safe lane, and use dive only if the line is clear. If you are on the bubble, then and only then you can take the aggressive option: a clean jump–dive through the final gap.
Abilities and “contact play” in 2026: staying upright under pressure
In modern Stumble Guys, Abilities add another layer to how people fight for space. You don’t need to mirror every ability choice, but you do need awareness: assume that near choke points someone can create sudden contact or disruption. The consistent response is spacing—leave half a character width when possible and avoid standing directly behind another player on narrow tiles.
When you get hit, your first instinct is to steer immediately, but that often makes you topple again. Instead, prioritise recovery: let the character settle, then move. If you’re sliding, aim your camera towards the safest landing zone, not the fastest one. One controlled recovery is better than two frantic corrections that send you off the map.
Finally, learn “soft defence” against grabs and bumps: keep moving, but don’t sprint into shoulders. If someone is crowding you, step slightly to the side and let them over-commit. Many players sabotage themselves by forcing contact; if you give them a little space, they often stumble first, and you keep your run alive.